
Pi Zero is a small board – part of the Raspberry family – designed for embedded applications where space is a constraint. The low cost (about 10€ for version W, with wifi connectivity) and the ability to run different operating systems makes it the ideal choice for different applications (media centers, data loggers…).

Raspberry Pi Zero unfortunately doesn’t offer a dedicated audio connector: audio output is indeed normally performed via HDMI:
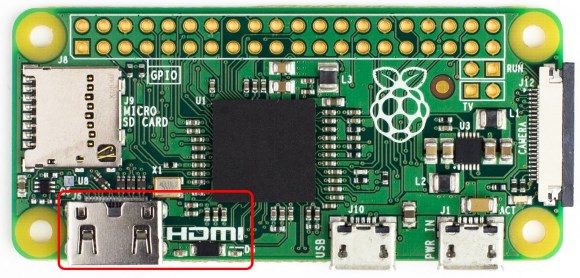
Although this is perfect for applications like media centers (where audio and video are reproduced by the monitor/television connected via HDMI), it’s not handy in embedded applications where you only need to play some audio files (for example to add audio warnings). Even if you can find on the market some devices that extract audio flows from the HDMI stream, those devices are often expansive and bigger than the Raspberry Pi Zero itself!
A very simple solution, well explained in a tutorial by Adafruit, is to generate the audio signal using two PWM (Pulse Width Modulation) pins and a low-pass filter made with some passive components. This solution has the advantage of being very cheap and easy to make; by contrast the sound quality is not very high.
In today’s tutorial I’ll show you how to generate high quality audio using the I2S bus.
I2S
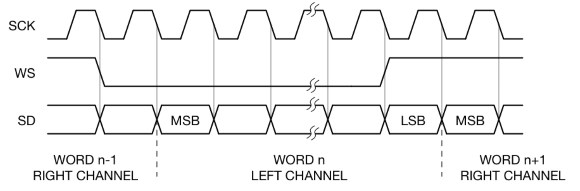
I2S is a serial bus designed to connect different audio devices and to transfer audio signals in digital form.
The bus specification has been published by Philips in 1986. The I2S bus requires at least 3 signals:
- clock (labelled as SCK – serial clock o also as BCLK – bit clock)
- word select (WS, sometimes defined also LRCLK – left/right clock)
- serial data (SD, or also SDATA…)
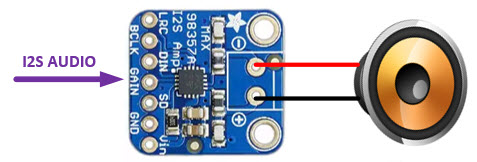
We can use this bus to communicate audio data between our Pi Zero and an amplifier that accepts audio input via I2S bus:
What you need
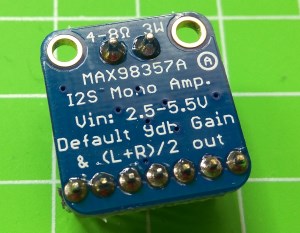
I chose an I2S amplifier based on the MAX98357 chip by Maxim. This chip offers 3.2W in output and you can connect directly a small 4 ohm speaker. Both the breakout board with the Maxim chip and the speaker are from Adafruit:
I brought the components from an italian reseller, melopero:
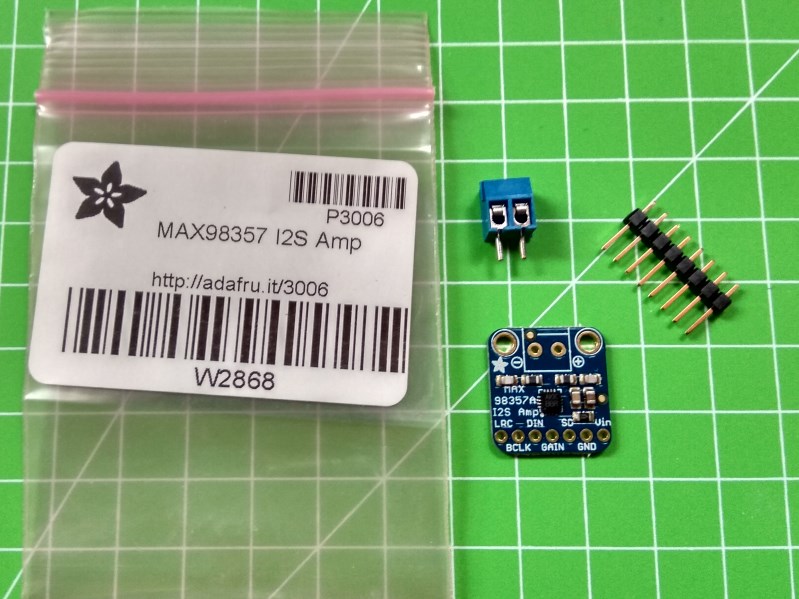
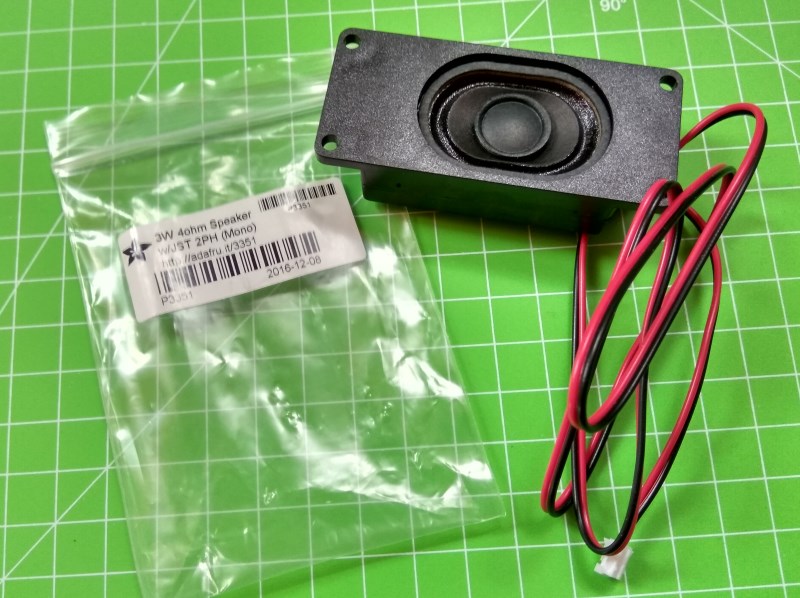
The breakout board is shipped with a terminal block (for the speaker connection) and with a pin strip header for the power supply and the I2S bus; both of them have to be soldered to the board:

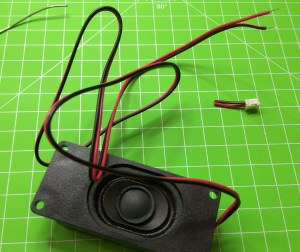
The speaker comes with a JST connector that I removed to be able to screw the wires in the terminal block:
Connections and configuration
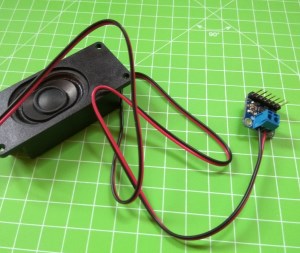
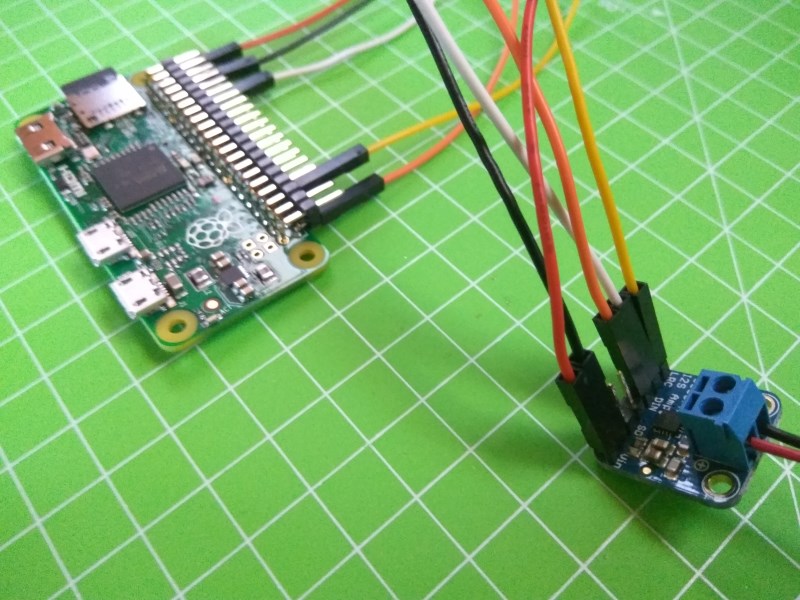
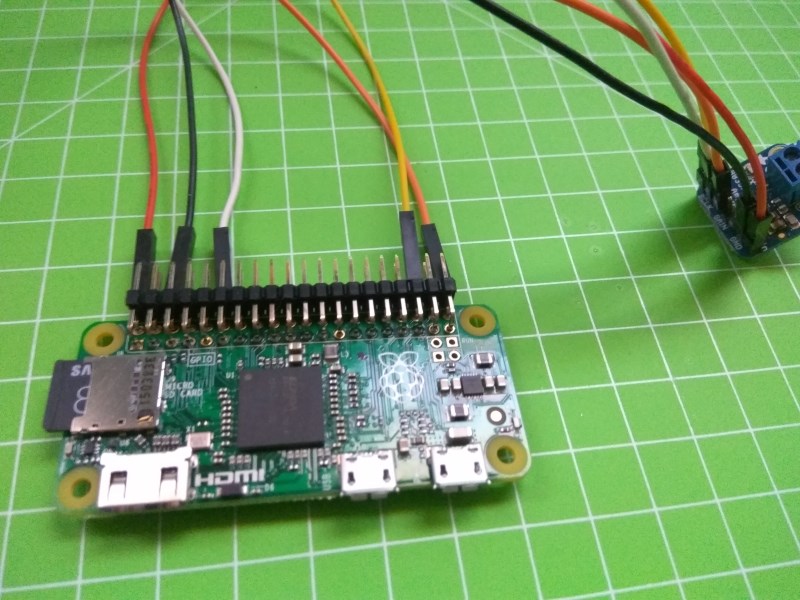
You need 5 wires to connect the MAX98357 amplifier to the Raspberry Pi Zero:
[checklist]
- 5V Raspberry -> Vin
- GND Raspberry -> GND
- PIN18 Raspberry -> BCLK
- PIN19 Raspberry -> LRC
- PIN21 Raspberry -> DIN
[/checklist]
Hare are a couple of photos that show the connections listed above:
Let’s now move to the software configuration, starting from an updated version of the Raspbian distribution.
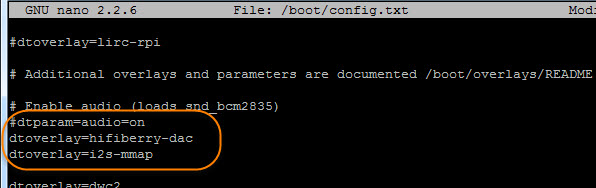
Open with a text editor (for example nano) the file /boot/config.txt
sudo nano /boot/config.txt
comment (add a # at the beginning of the line) the line dtparam=audio=on and add two new lines – dtoverlay=hifiberry-dac e dtoverlay=i2s-mmap:
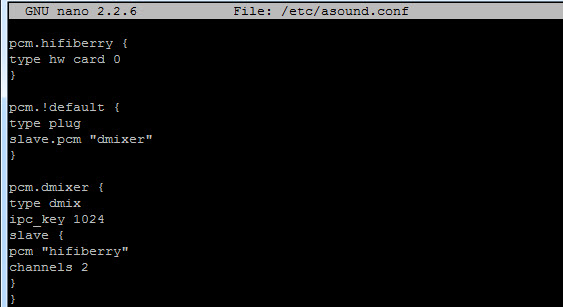
create a new file, /etc/asound.conf
sudo nano /etc/asound.conf
and add to the file the content in the screenshot below:
The last step is to reboot the Raspberry.
Test and mps-youtube
Let’s try to play a sample audio file with the command:
speaker-test -c2 --test=wav -w /usr/share/sounds/alsa/Front_Center.wav
If connections and configuration are ok, you should hear a voice saying “front – center” in loop; stop playing with CTRL-C.
To be able to play mp3 files, you need a player. I chose mpv:
sudo apt-get install mpv
Let’s hear again the historical sentence by Neil Armstrong – One small step for men, one giant leap for mainking – directly from the Nasa website:
mpv http://www.nasa.gov/mp3/590331main_ringtone_smallStep.mp3

In the end of this post, I’d like to show you how to use a program, mps-youtube, to play audio tracks from Youtube using only a command-line interface. Because of it’s written in Python3, you have to install version 3 of the language interpreter and one if its package managers, pip:
sudo apt-get install python3 python3-pip
Now you can install mps-youtube and its requirements with:
sudo pip3 install youtube-dl mps-youtube
Run the program with the command mpsyt. First you have to configure the player you want to use (mpv):

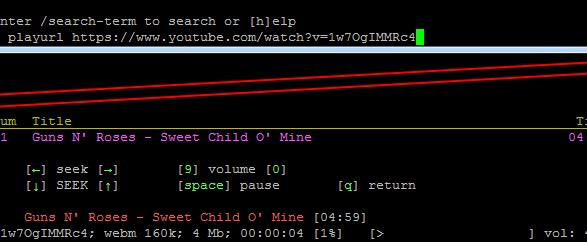
Then you can search for a video, typing the search string preceded with /. Alternatively, if you already know the video URL, you can play it with the command playurl <url>:
Noise when changing track
It may happen that when changing the track or at the beginning of a new reproduction, you hear some noise coming from the speaker. The reason is well explained in this thread on the Adafruit customer forum (thread I also contributed to): the cause is the frequency change of the I2S clock signal.
The easiest way to solve the problem is to continuously play a silence signal of a fixed frequency (for example 48KHz):
aplay -t raw -r 48000 -c 2 -f S16_LE /dev/zero &
Run the above program before starting mpv or any other player and you’ll find that all the noise is gone!
Demo
Here’s a video showing mps-youtube in execution:


I have been trying to do the same thing with the Raspberry pi 3 B with the April release and Jessie interface. Have you tried the RPi 3? I went through the Adafruit tutorial and I have all the commands correct. On Jessie I’m getting a red X and when I go into the audio settings I get that an ALSA device is not available. Any ideas would be appreciated.
Hi Darren, unfortunately I don’t own a Pi3 so I cannot test it…
Hi Luca, Thanks for the nice demo and the instructions. I followed them and everything worked nicely except volume. The sound is very, very low and not adjustable with alsamixer. I’m running the rpi-z headless, so that’s all I’ve got. Have you encountered this before? When I run AlsaMixer it says “This sound device does not have any controls”
Hi Dan! Unfortunately no, I did’t find any problems related to volume control… but I found on the official Raspi forum this thread that may help… let me know if it solves your problem!
Hi Luca,
I have the same problem as Dan Powell has. All setting went OK, but the sound is indead very, very low. Get also the same text “This sound device does not have any controls” Tried the volume control setting from the thread you posted, but didn’t get it to work. Do you have some other thoughts what to try?
running on py zero.
Just to add:
I got the alsamixer back working. Look on this page https://learn.adafruit.com/adafruit-speaker-bonnet-for-raspberry-pi?view=all#raspberry-pi-test.
I got it in sync and it works. But still the audio is very, very low. Put it on 100% whit alsamixer. The ITEM in alsamixer is now PCM, i don’t see the gain.
Ciao, giusto per capire, l’amplificatore che usi, l'”Adafruit I2S 3W Class D Amplifier Breakout – MAX98357A” può gestire solo piccole casse o il segnale emesso può essere utilizzato come segnale di linea per pilotare anche casse attive (con amplificatore integrato) o indirizzato verso un impianto di amplificazione?
ciao, è possibile collegare il suo output a casse attive o amplificatori esterni
ciao Luca grazie per il tutorial, sono + o – riuscito ad assemblare questo prototipo sulla base di un modello adafruit
https://drive.google.com/file/d/1gozgOLMnTxU7ViXapGLShEmLIAFW4kRq/view?usp=sharing
ho seguito il tuo tutorial, ma non sentivo niente, purtroppo ho solamente i pin liberi che vedi , non ho potuto utilizzare quelli del tuo schema, ho provato anche la guida :
https://learn.adafruit.com/adafruit-max98357-i2s-class-d-mono-amp/raspberry-pi-wiring
sembra abbia installato il tutto dandomi esito positivo, ma non sento niente.
non so veramente cosa fare ? si possono usare i pin che ho messo io? esiste uno script autoconfigurante? Sono disposto a pagare se possibile configurarlo a distanza.
grazie
Alessio
Ciao Luca , la famosa frase non era “One small step for men, one giant leap for mainking” bensì’ “That’s one small step for a man, one giant leap for mankind.”.
Per il resto , complimenti per il sito , i tutorial e gli articoli.
grazie mille per la precisazione!