
On the market you can now find leds that also include a control chip (WS2811, WS2812, APA106…).
The main advantages of this kind of leds are:
[checklist]
- you can control them using just one digital pin
- they can be connected in cascade but still individually controlled
- they can be supplied with 5V without the need of external resistors (like the “normal” leds)
[/checklist]
Leds
Troniqa sells 8mm RGB leds that include an APA106 chip: in this short tutorial I’ll explain you how to control them with Arduino.
Each led has 4 pins:
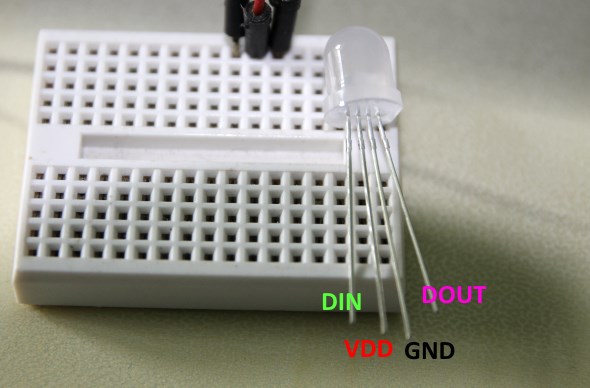
The connection is simple: power (5V and ground) must be connected to VDD and GND pins.
DIN and DOUT (data-in e data-out) pins are the control pins: to connect the leds in cascade, you must connect the DOUT pin of the first led to the DIN pin of the second and so on… The DIN pin of the first led must be connected to Arduino while the DOUT pin of the last led can be left unconnected.
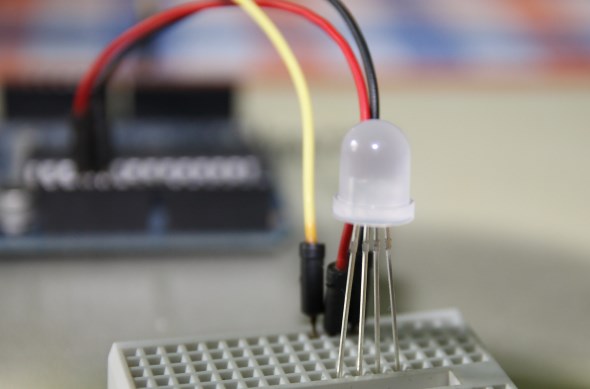
In this example I’ll use one led put on a breadboard and pin 6 of my Arduino to control it:
Arduino
Adafruit developed an Arduino library (NeoPixel) to drive this kind of leds.
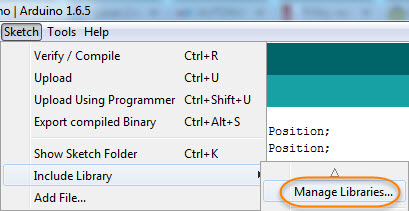
If you have an updated IDE, you can install the library through the Library Manager:
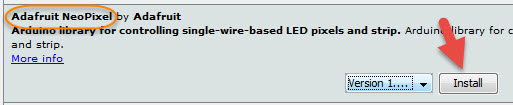
With the search function, you can find the Adafruit NeoPixel library; install it with a click on the Install button:
The usage of the library is very simple: define the number of leds that you want to drive, the Arduino pin you’re going to use and create a new instance of the Adafruit_NeoPixel object:
#define PIN 6 #define NUMPIXELS 1 Adafruit_NeoPixel pixels = Adafruit_NeoPixel(NUMPIXELS, PIN, NEO_GRB + NEO_KHZ800); void setup() { pixels.begin(); } |
Adafruit published a fantastic tutorial that explains all the features of the library. For this blog post, I developed a simple sketch (you can download it from Github) that changes the color of the led through all the color wheel:


ciao Luca
ho scoperto questi led grazie al tuo blog, comprati ed arrivato. Spero di provarli stasera
Stavo leggendo sul link a github il file ESP8266.c. che tu sappia è il nome dell’integrato che gestisce il led? cercando con san google esp8266 mi sembra essere un modulo wifi.. proverò a cercare meglio. è interessante la temporizzazione fatta con i cicli di clock. Forse è una cosa scontata per molti, ma per me è una novità. potrebbe essere usata al posto del millis in temporizzazioni ultrabrevi? sarebbe interessante un tutorial a riguardo
torno a studiare, intanto complimenti per il blog e per il lavoro svolto. ho imparato diverse cose grazie a te.
se avrà la parvenza di qualcosa di funzionate ti mostrerò cosa volevo fare con i led.
buon lavoro
mirco
Ciao Mirco… che link hai seguito per andare su Github? ESP8266 è un integrato wifi, non ha legami con i led (che hanno come chip di controllo appunto l’APA106). grazie per i complimenti 😉
ciao luca
ho preso un granchio
evidentemente avevo bisogno di un caffe…
sono andato su github cliccando sulla parola neopixel della frase “Adafruit ha sviluppato una comoda libreria per Arduino (NeoPixel) per controllare…” e li ho aperto il file ESP8266.c
Questo fine settimana voglio provare a comandare i led montati in una placca di un punto luce del garage dove ci sono tre pulsanti tutti e tre luminosi.
la mia idea idea era di usare i colori dei led per indicare se i pulsanti sono attivi per comandare la luce oppure se è attivo un eventuale sensore di presenza per l’accensione automatica della luce.
voglio vedere se 4/5 metri di cavo tra l’arduino ed i led raccoglieranno abbastanza disturbi per far si che non funzioni nulla… con un po di fortuna…
spero di darti presto notizie positive.
buon lavoro,
mirco