

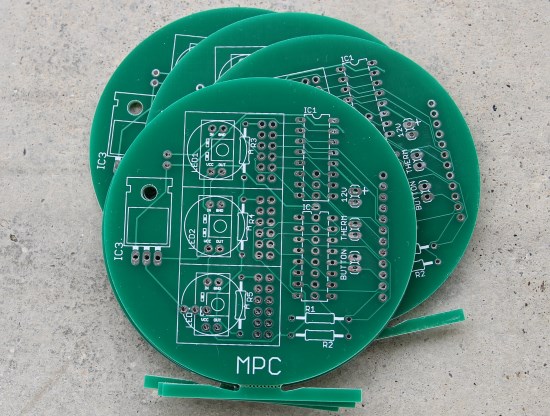
Today I received from Elecrow the PCB for my Nixie thermometer:
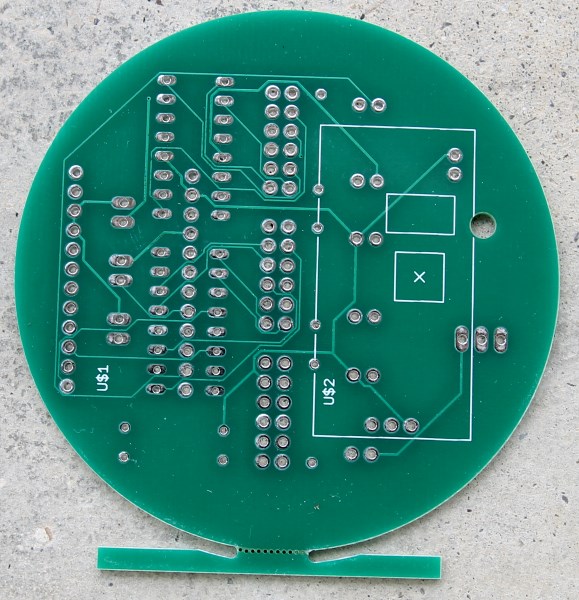
Here are two photos of the top and bottom sides:

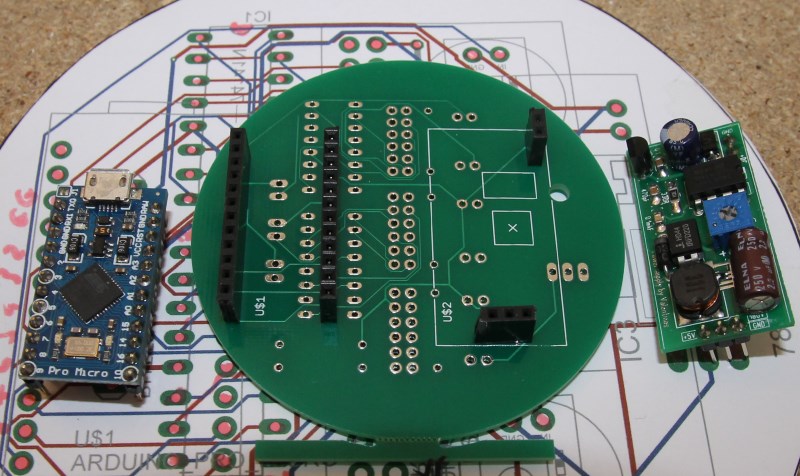
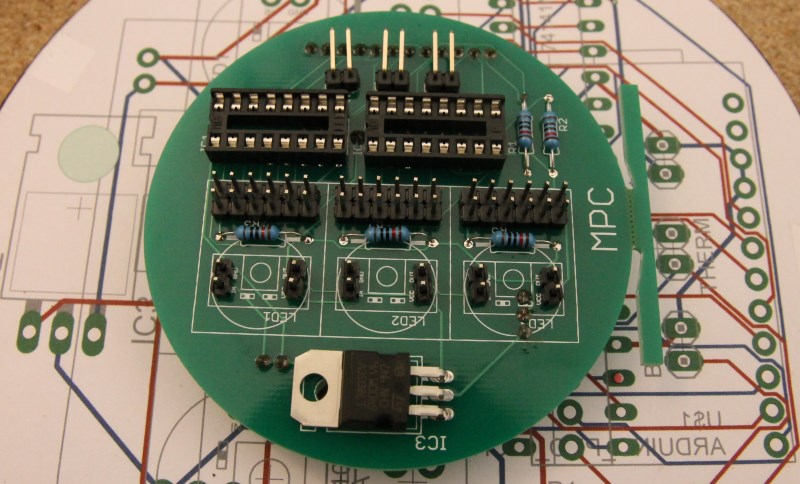
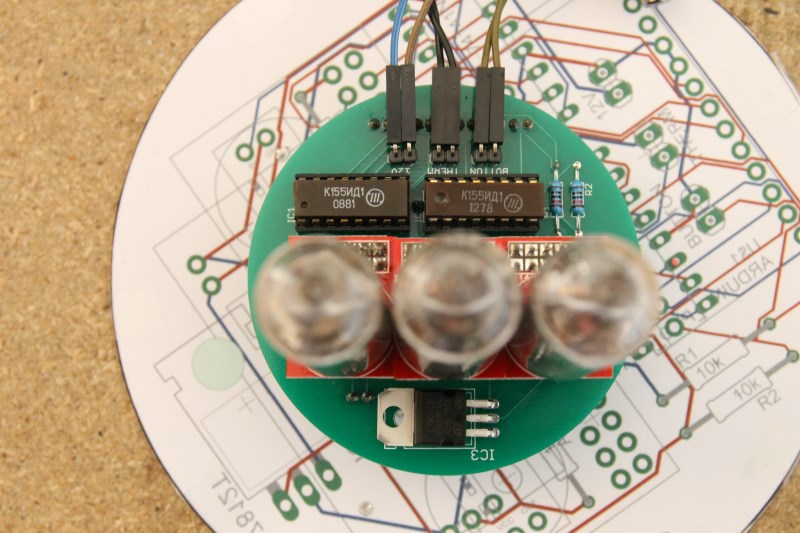
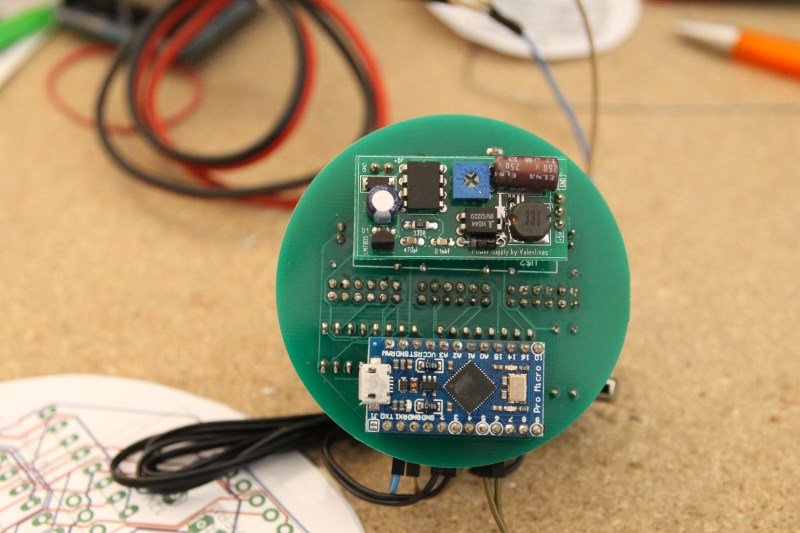
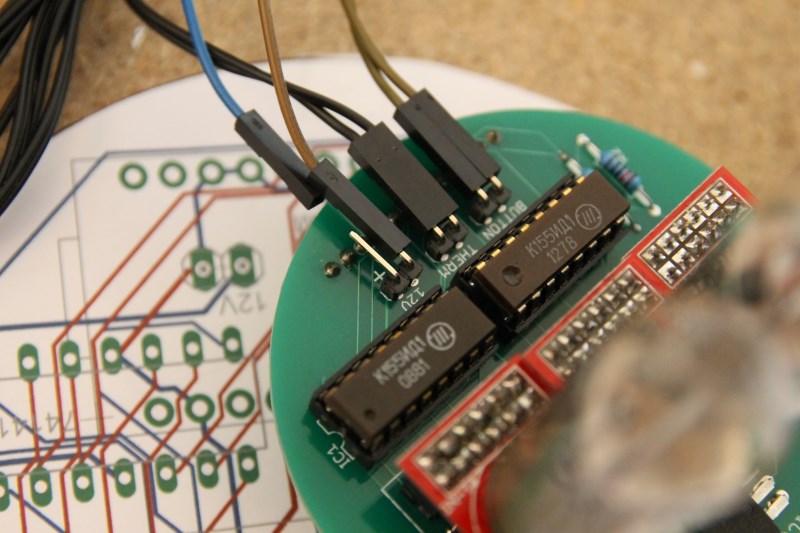
First, I soldered the female connectors for the Arduino and the power supply module on the bottom side; then I soldered the sockets, the resistors and the 5V voltage regulator on the top side:
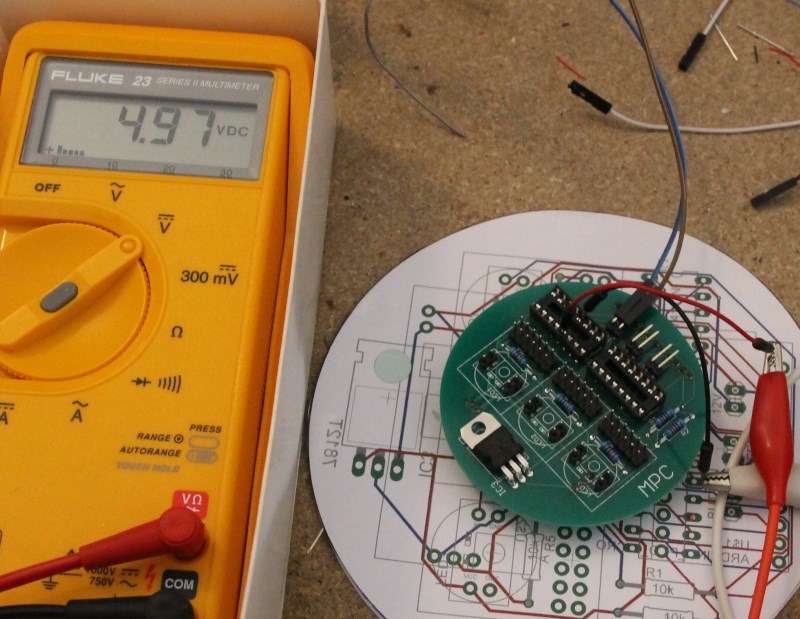
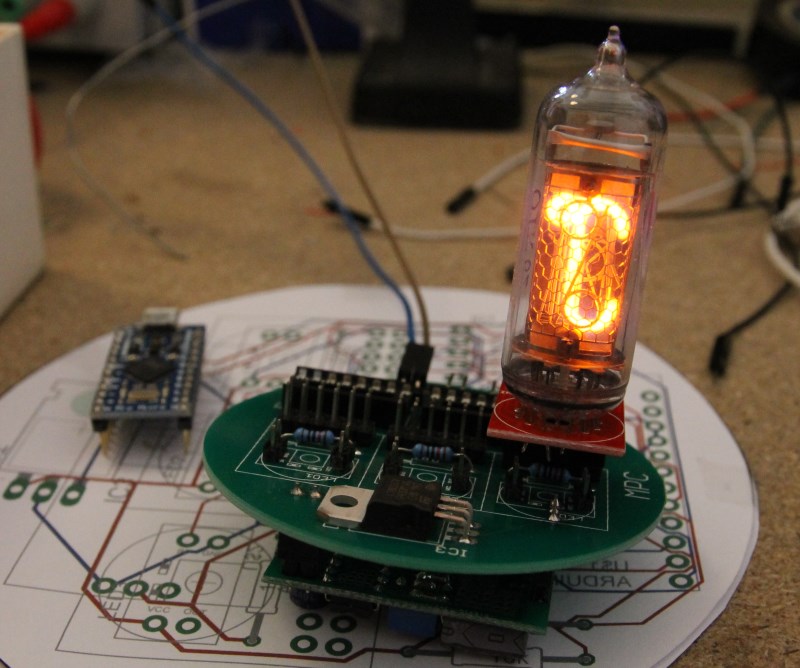
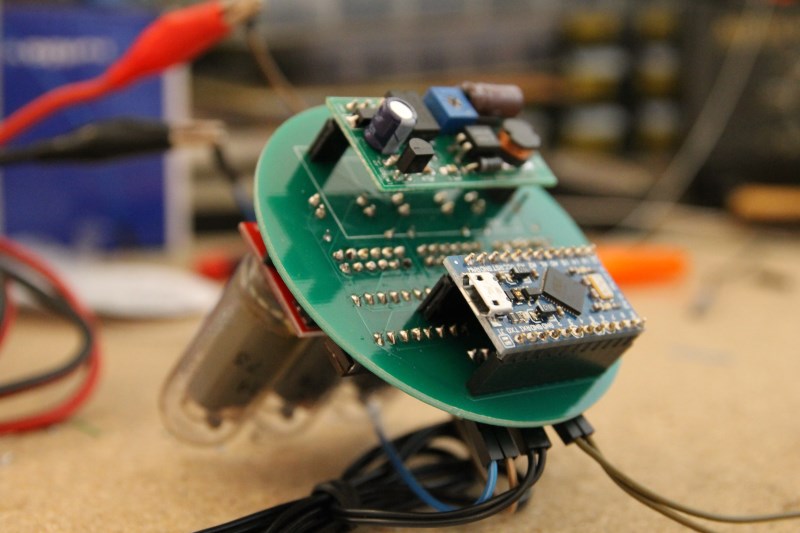
Before going further, I performed a smoke test: it’s indeed very important to check that the power supply is correct measuring with a multimeter the voltage that is present in different points (sockets, leds…) of your circuit. The test was ok, so I put in place the nixie with the symbol °C and verified that it lighted up (that nixie is directly connected to the power supply):
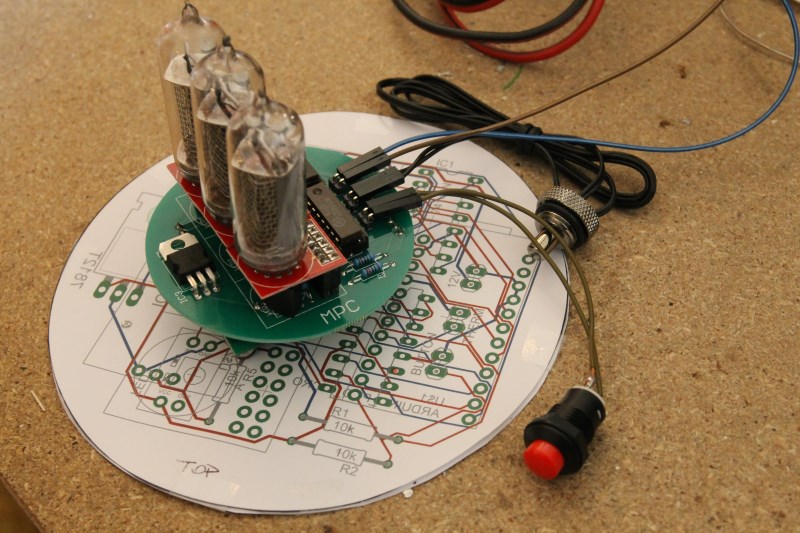
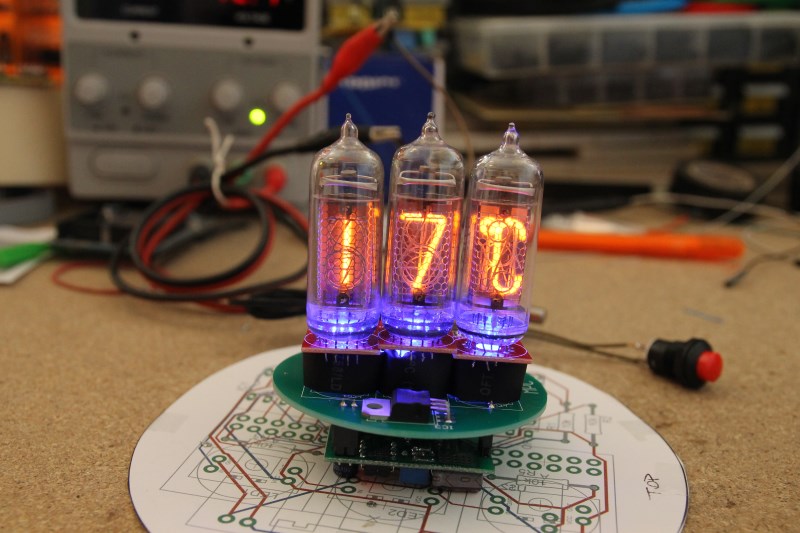
At least, I soldered the led modules, inserted the drivers in their sockets and put the other nixie tubes in pace: the project was completed!


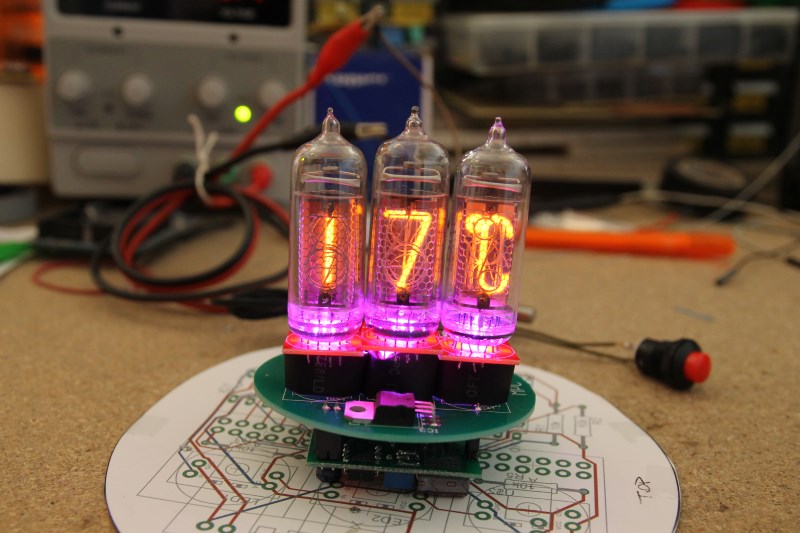
Gallery
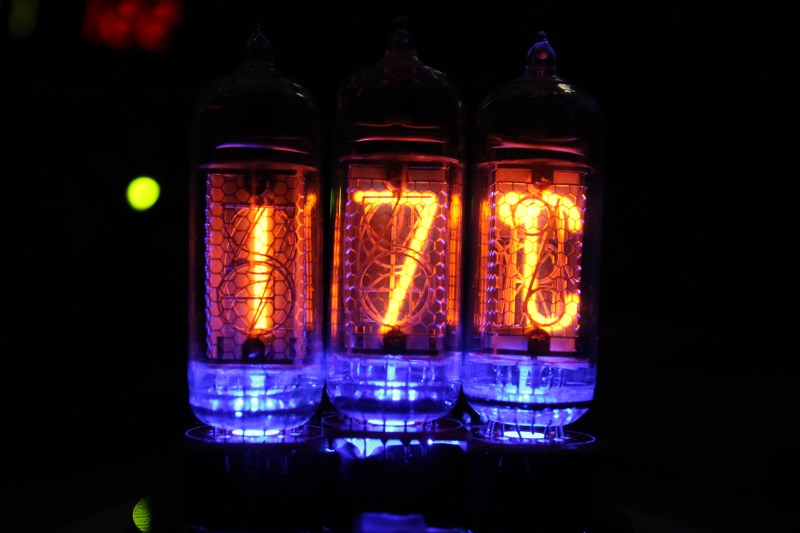
Here are some shots of the nixies with different led colors and a short video about the project:


Mistakes
When I was assembling the first PCB, I noticed two mistakes:
[badlist]
- the silk screen of the power connector is wrong: the + mark is near the negative pin
- the distance between the nixie tubes is not enough: the PCBs overlap
[/badlist]

I’ve already updated the Eagle files in my Github repository…


hi, do you sell the nixie thermometer kit?
thanks!
regards,
Jan
Hi Jan, no: all the design files are available on my repository but I don’t sell PCBs or complete kits.
looks great
Hi, super project! But, why don’t you finish the clock with interesting idea to use PCF8575 IC? Clock can maybe show temperature.. please.. finish the clock with pcb.. Thanks!
Hi Mark, this is not a clock… it’s a thermometer
I now, but i mean this project (your) – not finished clock project.. http://www.lucadentella.it/en/2012/03/16/orologio-nixie-3-rtc-ed-expander/2/
Most nixie clock show temp, who need separate temp?
Bye
7812T for 5v?
Is this right?
I thought maybe 7805
Hi Mark… confirm it’s a 7805
Is there a list of components? I rly want to build this for my fallout style casemod.
So most things i have figured out by now but i cant find what power supply you used. Can i get it from somewhere?
Hi, unfortunately it’s no longer available but you can use any other Nixie PSU
Hi Phillip, you can find all the components in the Eagle project
I have all the parts now and did some soldering but i dont know how to upload the code to the arduino pro micro. When i try to upload the code i get this error:
stray ‘#’ in program
What version of arduino IDE do i need? Do i need to have any librarys? I m a total noob to programming …
I uploaded this code: https://learn.sparkfun.com/tutorials/pro-micro–fio-v3-hookup-guide#example-1-blinkies and it worked so i must be missing something. Could you help me pls? 🙂
Hi, Arduino Micro is ok, you only need to install the NeoPixel library by Adafruit in your IDE.