
In the previous two posts of this tutorial, I explained how to perform an over-the-air update of the firmware running on the esp32 chip.
Sometimes you may need to revert to the factory firmware, that is the firmware stored in the flash memory when the chip was programmed. Many consumer devices have a button or a pin that, if you press it for some seconds, triggers a reset function:
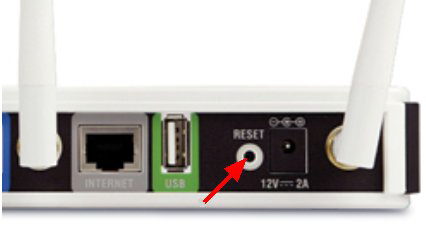
In this post I’ll show you how to add this functionality to your project.
Partitions
As explained in a previous post, the flash memory connected to the esp32 chip is divided into some partitions, based on a layout configured when you program the chip.
Partitions that can store firmwares are of the app type. The partition that contains the firmware programmed via USB, has the factory subtype.
The esp-idf framework includes a method to search partitions in the flash memory:
#include "esp_partition.h" [...] esp_partition_iterator_t esp_partition_find( esp_partition_type_t type, esp_partition_subtype_t subtype, const char* label); |
You can specify some filters to narrow down the results (they are not mandatory, use NULL if a filter is not needed): the type of the partition, the subtype and also a specific label.
If you want to look for the partition that contains the factory firmware, you can therefore write:
esp_partition_iterator_t pi = esp_partition_find( ESP_PARTITION_TYPE_APP, ESP_PARTITION_SUBTYPE_APP_FACTORY, NULL); |
The method returns a partition iterator, that is an object that allows to scroll through the partitions found.
If the search was successful, this object is not NULL and you can get a pointer to the partition with the method:
const esp_partition_t* esp_partition_get(esp_partition_iterator_t iterator); |
After the use, it’s important to release the iterator object with:
void esp_partition_iterator_release(esp_partition_iterator_t iterator); |
After having obtained the correct partition, that contains the factory firmware, you only have to flag it as the boot partition and restart the chip:
if(pi != NULL) { const esp_partition_t* factory = esp_partition_get(pi); esp_partition_iterator_release(pi); if(esp_ota_set_boot_partition(factory) == ESP_OK) esp_restart(); } |
Demo
In the following video you can see how to perform a factory reset. In the video you can also learn how to “count” the number of seconds a button is pressed to trigger the reset function only after a fixed threshold (3 seconds in my example). Enjoy!


Ciao Luca. I cannot find video link on this post. Anyway I’ve found it on Google. Good job! I didn’t know this function. Thank you
hi
it’s possibile to make a tool like this
http://handheldsci.com/kb
with esp32?
transform a usb keyboard in a bluetooth one
thanks
not an easy way because of esp32 doesn’t include an hardware usb host controller (needed to connect to usb keyboard/mouse)
USB host isn’t required for a keyboard or mouse. The vast majority of USB keyboards and mice are backwards compatible with ps/2. Those little USB to ps/2 converters that used to be bundled with usb keyboards and mice are purely mechanical.
USB data + becomes the ps/2 clock and USB data – becomes ps/2 clock. No idea of the voltages, I’d assume about 4.5~5 volts but after that problems been handled I’m almost certain you can interface almost any USB keyboard or mouse to an ESP32 and read the keystrokes / mouse input.
USB data – becomes ps/2 data.***
Hello Luca, thank you, this is a very useful tutorial!
I could not find the source code in your repository, maybe I am missing something, or will it be available soon? thanks!
hi, as the code to perform the reset is only 6-7 lines (described in the article) I didn’t prepare a full example
Hi Luca, a great set of tutorials for an ESP32 newbie like me. I started learning with a Joy-It board. I use the Arduino IDE to upload sketches (.ino). I do not completely grasp the difference between firmware and an app, which is, in my view, the code in the uploaded .ino. This is because of the following: when I power down after uploading and running a sketch and then power up again, it is the sketch code that starts running again. So, apparently, the code is still in the memory. In my understanding this is a property of flash memory. So: what is the difference between flashing new firmaware and uploading a sketch/app? For me it looks the same.
Hi Fred, thanks for your comment. In Arduino world, the two are the same (app/firmware). But with the esp32 you can “store” different firmwares (in the APP partitions) and decide which one you want to execute. The common way to use it is when you store a factory firmware when programming the chip and then send updated firmwares later… you can have at the same time in your flash both the original firmware and the new one.