
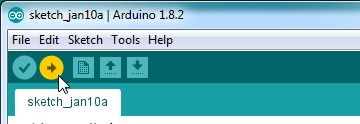
After having developed a sketch using the Arduino IDE, you can compile and load it on the Arduino board connected to your PC with just a click on the upload button:
The program is stored in the flash memory of the microcontroller (on Arduino Uno boards this is the ATmega328p).
You can upload your program on the microcontroller without the need of a dedicated programmer because of the microcontroller itself runs a small program named bootloader.
The bootloader is indeed a program, already flashed in every microcontroller of the Arduino boards, that is executed everytime the microcontroller is reset. The first operation the bootloader does is to check if on the serial/USB connection there’s a request to flash a new program. If so, the bootloader talks with the Arduino IDE, receives the new program and stores it in the flash memory:

The bootloader used as of now on the Arduino Uno boards is named optiboot.
If you buy an ATmega328p chip and you want to upload your sketches on it using the Arduino IDE you have first to flash the bootloader in the chip. You usually need a dedicated programmer to program the chip. ATmega microcontrollers support a programming method named In System Programming (ISP), designed to program the chips directly on the board where theyt are located.
This method requires to connect 6 pins of the chip to the programmer:
[checklist]
- 5V and ground
- reset
- MISO, MOSI and SCK
[/checklist]
For example every Arduino Uno has a dedicated connector which allows to re-program the ATmega328p chip without removing it from the board:

On the Internet you can find several ATmega programmers (for example this by Adafruit); very interesting is the possibility to use an Arduino as a programmer, thanks to the work of Randall Bohn.
First you have to upload on your Arduino the ArduinoISP sketch which is included in the Examples shipped with the IDE:

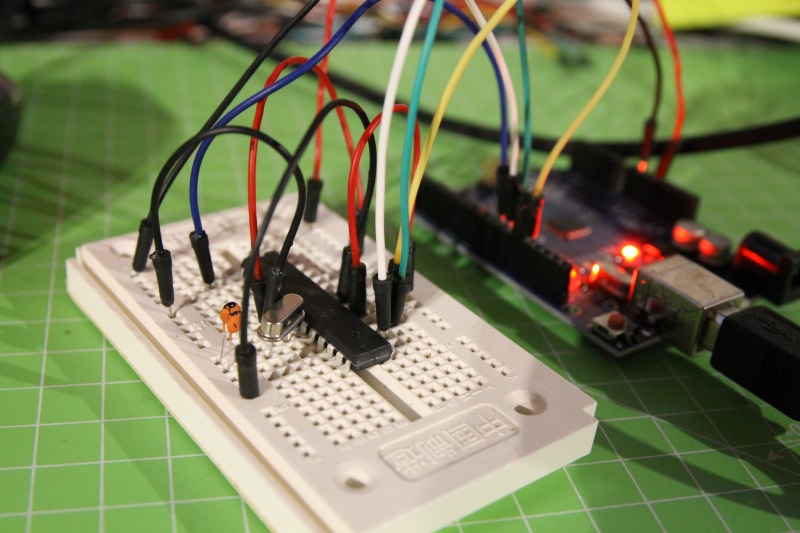
then you have to create – for example on a breadboard – a minimal circuit with the chip to be programmed, a 16MHz crystal and two 22pF capacitors:

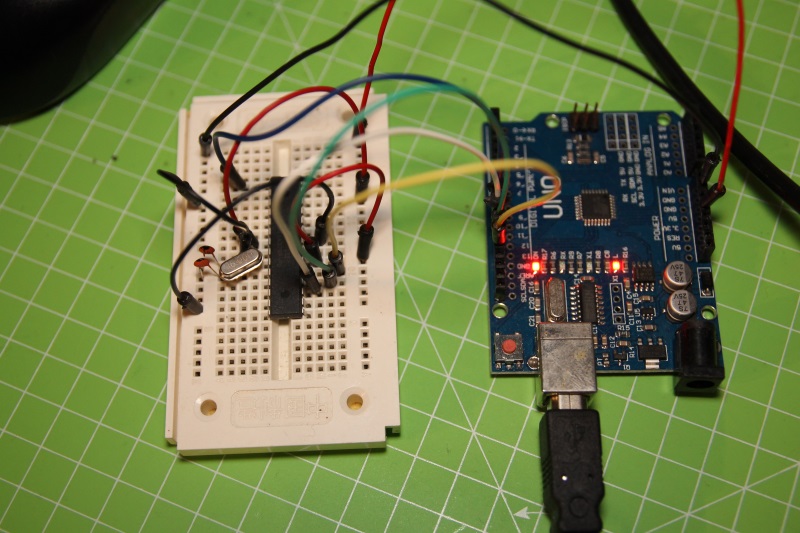
using some jumpers, connect your Arduino Uno to this circuit as it follows:
- 5V -> pin 7 and 20
- Ground -> pin 8, 22 and the two capacitors
- pin 10 of Arduino or RESET of the ICSP connector -> pin 1
- pin 11 of Arduino or MOSI of the ICSP connector -> pin 17
- pin 12 of Arduino or MISO of the ICSP connector -> pin 18
- pin 13 of Arduino or CLK of the ICSP connector -> pin 19
Configure the IDE to use Arduino as programmer:

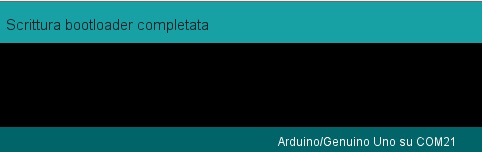
then burn the bootloader:

after few seconds, the IDE should confirm that the bootloader was programmed on the chip:
Shield
On some webstores I found an Arduino shield which makes it simple to program ATmega chips. It’s named AVR ISP Shield and manufactured by a company called “OPEN-SMART”:
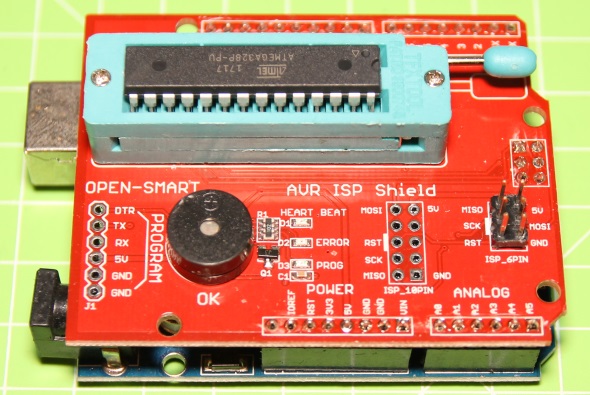
This shield has a ZIF (Zero Insertion Force) socket where the chip goes, some pins to connect it to external boards and a buzzer that is used to confirm the burn process with two beeps.
On the Internet I found an archive with the documentation about this shield and the “official” sketch. You can also use the sketch shipped with the IDE, it won’t only activate the buzzer when the burning process ends successfully.
If you need to program several ATmega328p chips (for example if you’re building your Arduino-compatible boards) the use of this shield makes the programming process much easier and faster!


Grazie sei stato molto chiaro,